Quantcast
Channel: Here's no great matter
Viewing all 493 articles
Browse latest View live

Modern Spearhead: Clash at Oberickelsheim

$
0
0
In December 1979 the 1st Brigade of the US 3rd Infantry Division was tasked with hitting the flank of the advancing Czech 15th Motor Rifle Division and stalling its approach to the Main River.

Stolen from Luke's blog 'hoti to kratistos'

Accordingly, the commander laid plans to do just that.

The forward deployed 3/7 ACAV troop, on the scene at daybreak, was ordered to advance to the Main and follow it north until it encountered the enemy.


But in a shock to the ACAV's recon elements, it happened that the Czechs were closer then anyone had thought...


As the lead recon units began to trade fire, other Czech units were making their way to the combat zone. Thankfully for the Americans, heavy rain turned the fields into boggy hindrances to the Czech advance.


1/30th Battalion arrived in time to provide the firepower needed to halt the initial Czech attacks.


But with the AVAC elements tied up in a firefight there was nothing to stop the Czech advance to the river further north.  The bridging equipment in evidence gave notice of their intentions...


As tensions rose, the 2/64th American armored battalion arrived, and with this the Czech opportunity to take 1/30 in the southern flank vanished, to the great relief of the American commander.


The day now settled into a series of patterns: Czech advances in the centre were stopped by the massed firepower of the M60A1s and the heavy artillery; Czech reinforcements struggled to get through the mud to aid their compatriots and, in the north, the Czechs continued their steady approach to the Main.


The Czech centre paid a heavy price for its attacks, but the river was bridged, and with air strikes impossible in the wet weather the advance units began crossing.


With time running out for the players, the action was called at 11:00 game time with the Czechs across the river but the Americans having routed the Czech centre and things very much in the balance.


It was a fantastic day and a real treat to see so much happening on such a beautiful table.  Many thanks to my noble opponent Pat and to Luke (whose more in-depth reports can be found here and who put the game on and hosted us) for a great wargaming experience.


Xyston and Essex comparison

$
0
0
This is just a quick comparison for an Ancmed member who is wondering about figure compatibility.


Xyston Persian command centre and left; Essex on the right.


From the rear.  Xyston figures are chunkier, but I don't think unreasonably so.


The horses: Xyston slightly longer, but the height is about the same.


Some more from different angles.


My conclusion is that they'll go together fine - especially being well-fed and caparisoned commanders - but I'm less picky than some!

A good day

$
0
0
Well, today has been a good day.

An order I put in with Brookhurst Hobbies for some of their Xyston clearance packs has been confirmed and they had nearly everything I was after.  In addition, this morning there was a break in the cold weather and I managed to prime some Strategia Nova Samnites and all of the Old Glory Marian legionaries I need to complete my armies for Caesar's wars against the Optimates.

I am well satisfied and now all I need to do is paint them!

It sounds so easy when you put it like that...

On the table...

$
0
0
I've recently been playing one of my Christmas presents.  I'm enjoying it but as the plan is to do a review on it at some stage I won't say too much at the moment.


I will say though that due to the scope of the game and the limited number of counters occasionally the named leaders for the Gallic tribes are a bit out of place in a given scenario. Being a Caesar freak I couldn't take that and decided to make up my own counter for brave Dumnacus.  I'd taken a counter scan before cutting the counters out, so used Microsoft Paint to do a bit of wizardry and ta-da!  What a genius!

I then did the same thing with the obverse, saved and printed out.

I was all very proud of myself until I realised that as well as saving the doctored images separately, I'd stuffed something up and saved the improvised ones in place of the original counter scans, too.  Ta-da!  What an idiot!

There's a fine line between stupid and, uh, clever, as Nigel Tufnel and David St. Hubbins so famously said...


From way back: photos of first hobby efforts.

$
0
0
My wife was looking through some old photo CD-ROMs the other night and came across a folder containing shots from the very first batch of figures I ever painted, waaaay back in December 2005.

This find seemed like a good excuse to reminisce about first starting out, and some of the changes that have occurred.


The shots on this album are the only known photos of me painting, and I didn't even know about these until the other night.  The figures are from the Chariot/Magister Militum Polybian Roman and Later Carthaginian ranges.  I began with 2 DBM starter armies and built up from there, and Richard at MM was really helpful to a newbie.  If I remember rightly these figures were then £1.85 a pack; they are now £3.00, but the DBM armies still give a surprisingly good discount.

Other nerdy things to note: these days I mount figures on card in groups of 4-8 rather than individually.  I actually use lighting, and even lift the figures up to my face  rather than the other way around!  I also use the hobby room instead of the lounge.  We have had three kids since these photos were taken and the lounge is now a little too messy to be shown to decent company...

Amusingly enough, I seem to be employing the lid as a paint dish here.  I still use Tamiya and Mr Color paints occasionally (then 100, now c.150), but they are mostly supplanted by Turner Acryl Gouache.  My choice of brush has not advanced much, however.

Lastly, I have considerably less hair now than I did then, and am probably about 5kg sturdier.  But we won't dwell on that just yet...


Look at this for sublime artistry!  Close observation will reveal the signs of early experimentation with a 'magic (brown) wash' on the hastati at the back there.  It is not clear whether it did any good or not.


No, it didn't do much!


Ah, such innocence in this low angle shot!  We have a better class of digital camera now.  Sadly, that Junior Boggle box has gone the way of all flesh...


An intriguing morning-after clue to how I became 5kgs heavier?


But on a more positive note, I no longer indulge in my other 'head out to the balcony every hour and light up' hobby, so perhaps it all evens out!

So, there we go.  I had a wee chuckle looking at these, and I hope you will too.

Oh, and before I go, here's a shot showing today's postal goodies, just to prove that some things haven't changed!


Sixth Fleet play by email campaign

$
0
0
A while ago I came across a series of posts by Brad over at Hexsides and Handgrenades, the subject of which was Victory Games'Sixth Fleet.  At the time I knew nothing about this gaming institution, but I was intrigued by Brad's updates and so resolved to track down a copy for myself.

As Brad is another Japan resident and a dedicated moderns wargamer we got in touch and made plans to get a PBEM game underway 'some time'.

Well, it's taken us nearly two years, but that time has now arrived, and last night we kicked off the first scenario.

Brad knows the game fairly well but was kind enough to go easy on me and let us begin at the beginning.

Lord knows I need it!

So far I have managed to lose USS Drum and see USS Baltimore badly damaged, but the Soviets have been given a bloody nose as well, thanks to some Orions on ASW duty and the VASSAL modules' ability to roll three sixes in a row at a crucial point.

It's no lie to say that I've only been kept in the game by those dice rolls.

My planning has been pretty poor, and even though Brad has had only one decent sub against my two he has outplayed me throughout.  I do hope I'm beginning to get a better handle on ASW tactics now though, and if the activation rolls go our way we might just escape with a draw, which would be celebrated here as a Claudian Triumph, though without a full-sized elephant, naturally.

And the game? I'm loving it, and it's going to be well worth the learning.


Introduction to Commands and Colors: Ancients

$
0
0
(This is a piece I wrote c.2006 for Keith McNelly's now defunct e-zine "Across the Table".  I have posted it mostly as-is, but dropped one paragraph. Note that it was written for a miniatures gaming audience in New Zealand who had not heard of the game before)

Introduction to Commands and Colors: Ancients.


Commands and Colors: Ancients is a fast-play board war game designed by Richard Borg and published by GMT games.  The board employs hexes, and the pieces are wooden blocks.  Also included are command cards, custom dice, rules/scenario booklets and quick reference sheets.  The base game provides the armies of Rome and Carthage while the first expansion adds troops for Greece and Persia.  The forthcoming second expansion is entitled "Rome and the Barbarians" and will include Roman (probably of the Marian or Early Imperial variety) and "barbarian" armies. 

Commands and Colors (hereafter called C&C) converts very well to miniatures.  All that is needed - aside from the miniatures, of course - is a suitably sized hex-cloth or hex-board, which can be home made easily enough or purchased from Hotz or Kallistra.  The following is a brief introduction to the C&C system.

Units.

In C&C all units can take a set number of hits before being destroyed: 4 hits for foot, 3 for cavalry, and 2 for special units such as elephants and chariots. 

There are three main types of troops, all coded by colour and symbol: heavy (red triangle), medium (blue square) and light (green circle). Each type has sub-types. The medium class, for example, contains medium infantry (4 attack dice, 1 movement), warriors, (4/3 attack dice, 1/2 movement), medium cavalry (3 attack dice, 3 movement) and camels (3/2 attack dice, 3 movement). Each sub-class has its own distinct abilities.  In addition, leaders can attach themselves to units and affect combat results significantly. 

Special rules apply to some types of unit: most light troops and cavalry can evade enemy charges; warriors can move an extra hex if charging into combat; auxiliaries can move 2 hexes if they do not fight at all.  Elephants and chariots have a number of rules to reflect their special abilities.  

The Board.

Battles are played out on a hex board of 9 by 13 hexes.  The long side is divided into three sections to indicate the left, centre and right of the battlefield.  The scenarios in the booklet are all based on historical encounters.

The Dice.

The dice in C&C are of the standard 6-sided variety, but with symbols on the faces.  Three of the symbols are coloured.  A red square indicates a hit on a heavy unit, a blue triangle indicates a hit on a medium unit and a green circle indicates a hit on a light unit.  A helmet symbol indicates a hit if there is a friendly leader in the same or an adjacent hex.  Crossed swords indicate a hit if the attacking unit is a heavy, medium or auxiliary unit, while the flag symbol indicates a retreat.

In ranged combat hits are only ever scored on colours, never on swords or helmets.  Flags count as usual.

On the play of the rally or I am Spartacus cards, the dice are rolled to rally/activate units.  In that case, any colour rolled rallies/activates one unit of that type; any helmet rolled rallies/activates a unit of the player's choice.

The Cards and the Turn.

Depending on the historical scenario being fought, players start the game with a hand of 4 to 6 cards.  Each card allows a particular class of troops (e.g. light units), troops in a particular area (e.g. 3 units left), or troops near a leader (e.g. leader’s hex +4) to be ordered.  At the beginning of the turn, the first player selects an order card from his hand, plays it and carries out the move.  A new card is drawn to end the turn.  The next player then repeats the cycle and this continues until a winner is determined. 

The cards allow planning, but also mean that there is a healthy dose of uncertainty in the game.  Sometimes a player will get poor cards for a stretch, which can be frustrating, but the luck generally evens out.

Battle.

Combat is simple, but with many variables.  There are three types of combat: missile, ordered close combat, and "battleback."  Ordered missile units in range of the enemy may roll 1 or 2 dice, depending on whether they have moved or not, and have a 1 in 6 chance of scoring a hit and a 1 in 6 chance of forcing a retreat for each die thrown.  Ordered units adjacent to the enemy can choose to undertake close combat.  A certain number of dice are rolled (heavy infantry roll 5 dice, light infantry 2, etc.) and hits are scored on the roll of appropriate symbols.  If the enemy unit is destroyed or forced to retreat the attacking unit may advance into the empty hex and may in some circumstances be able to make a second attack.  If the enemy unit is not destroyed or forced to retreat it may "battleback" and attack as if it had been ordered. 

If forced to retreat, units must move their full movement allowance towards their own baseline.  If this is impossible, units must take 1 hit for each point of unused movement.   Supported units or units stacked with a leader can ignore one flag roll, so it is important to plan accordingly.  Retreat is especially dangerous for units with high movement rates.     

Morale.

Morale is not treated separately in C&C; it is factored into the combat and movement system.  Unit hits model casualties, disorder, and the loss of morale; all of which eventually turn the unit into a disorganised rabble which is no longer effective in the field.  This is the point at which the unit is removed from play.  Command cards also indirectly model the influence of morale states on movement in the same way that pip dice do. 

Victory and Defeat.

The play of turns continues until one of the armies overcomes the other.  This process is measured in banners.  A banner is gained each time an enemy unit or leader is destroyed - or sometimes when an objective is taken - and as soon as a player has won the required number of banners he is declared the victor.  It is common for players to switch sides and play again with the highest number of banners overall determining the victor.

Comments.

C&C is an abstract design.  Some people may not be comfortable with a game on ancient warfare that does not (for example) explicitly differentiate between units of different armour or weapon class.  In C&C all units of the same class function in the same way no matter whether one represents Roman triarii or a Macedonian phalanx.  What C&C provides is a fast moving, fun game that requires the use of tactics to win.  As with many rulesets, whether those tactics are realistic or not is open to question.

C&C tries to be a good game, not a simulation.  It gives a feel for ancient warfare but not at the expense of simplicity and playability.  However, the system can bear some tinkering, so additional levels of detail can be added fairly easily and without destroying the essence of the game.

At around US$50, C&C:A is not cheap unless you intend to play it as a boardgame also.  I have the base game and the expansion, and can honestly say it has been excellent value for money.  I have probably played around 60 games in 12 months, and it stands up well for solo sessions, too.

For anyone interested, a quick google search will yield a wealth of information about the game including the living rules, user-created scenarios and army lists for pick up games.


Three rules sets for '14

$
0
0
Over the last couple of weeks I've picked up a few new games and rules sets, and have pulled another couple out of the shelves with a view to expanding the range of rules I play.  These are the miniatures rules I'm keen to give some table time this year.

1) Might of Arms.  I love Lost Battles, Commands and Colors: Ancients does a job for me (though it's in New Zealand now which is a little inconvenient), I enjoy To the Strongest and have my own rules to work on, but I really want a dice and ruler ancients set that looks the part in 15mm (ie, not DBA!).  I'm hoping that this might be it.

2) Armati.  This is another dice and ruler affair I want to come back to.  I was really put off Armati after joining the yahoo group way back when I first got the rules in 2006 or 2007.  There were two camps on the yahoo group and each had a different interpretation on how to play a couple of things and these guys would get stuck into each other, often on a personal level, day after day, message after message, and couldn't let things rest.  I still gave the game a shot but I couldn't be bothered with rubbish of that ilk filling my inbox and wasn't interested in asking noob rules questions in that kind of environment so I quit the group. Now might be a good time to try the rules again (but I'm not going back to the group!).

3) Shipwreck!  These modern naval rules come highly recommended so I'm looking forward to getting them on deck.  I will probably use counters for a start, but may end up going for some NavWar fleets later on depending on how enthusiastic I can get about painting them.

That's the plan, but there's many a slip between cup and lip, as they say...

Farewell to an old companion

$
0
0
When I was a university student I used to live in Christchurch, New Zealand.  I had a favourite second hand bookstore in Cashel Mall, and I used to go in there whenever I had a chance.  That and the two second hand record stores were the places you'd see me then (unless I was in the pub). In about 1997 I went into this particular bookstore and found that there was a game there called Terrible Swift Sword.  It looked battered, but I decided I had to get it and used up a night's beer money to grab it for $25.

That bookshop now no longer exists, after being destroyed in the great earthquake of 2011, but I still have the game, or will do until tomorrow.

Because, not without a sight tinge of nostalgia, I've decided to part with it. It's not just that I've taken it around the world with me without ever having played it, but also that I know a fellow who had it when he was a young buck, would love to have it again, and will put it to good use on the table.

As Tennyson said:

How dull it is to pause, to make an end,
To rust unburnish'd, not to shine in use!

So tonight I got the map out for a look for old time's sake, took a few photos, and readied it for the post.

I'm very pleased that it's going to a good home and hope it will bring back some happy memories and help create a few more.

And here she is, in all her 1976 SPI glory!


the box

the battlefield

a certain town

a certain eminence


Alexander II of Epirus in Italy

$
0
0
On the Lost Battles yahoo group there is a member named Carolyne (Megalostrata) who is playing a campaign derived from Phil Sabin's Empire.  She usually uses DBMM to resolve the battles, but last week she posted details of the latest engagement and it sounded so interesting I decided to use it as the basis for a game of my own.

The situation is that Alexander II of Epirus, Pyrrhus's son, has joined forces with the denizens of Magna Graecia to take advantage of a Rome weakened by a just-concluded Punic War. If successful, this brave endeavour will establish once and for all the independence of the Greek city states of Southern Italy.

Alexander has brought over 15,000 phalangites, 15,000 mercenaries and 4000 horse to combine with the Tarentines.

In Lost Battles terms, his army looks like this:


  • 25,000 phalangites organised into six average (Macedonian) and two levy (Tarentine) units. 
  • 7,500 Thracians and Illyrians, or three average heavy infantry units.
  • 5,000 peltasts, or two heavy infantry units.
  • 2,500 slingers, or one light infantry unit.
  • 4000 Greek cavalry, organised as two guard veteran and two average units.  Alexander and his general, Nearchus, each have a veteran unit under their personal command. 
  • 2000 Tarantine cavalry, organised as one veteran and one average unit.


The total fighting value of this force is 70.

The Romans in response send a somewhat thrown-together force comprised of 4 legions plus alae, and an additional legion and ala picked up en-route.


  • 30,000 heavy infantry organised into twelve legionary units.
  • 12,000 light infantry in two levy units.
  • 4,000 cavalry organised as one veteran and three average units.


With the addition of the consul Gauis Genucius Clepsina as an average commander, the total fighting value of this force is 71.

Alexander has a gentle hill on which to deploy, while the Romans have a wood in their right centre and a steep hill on their left flank.


Turn 1 (deployment turn).

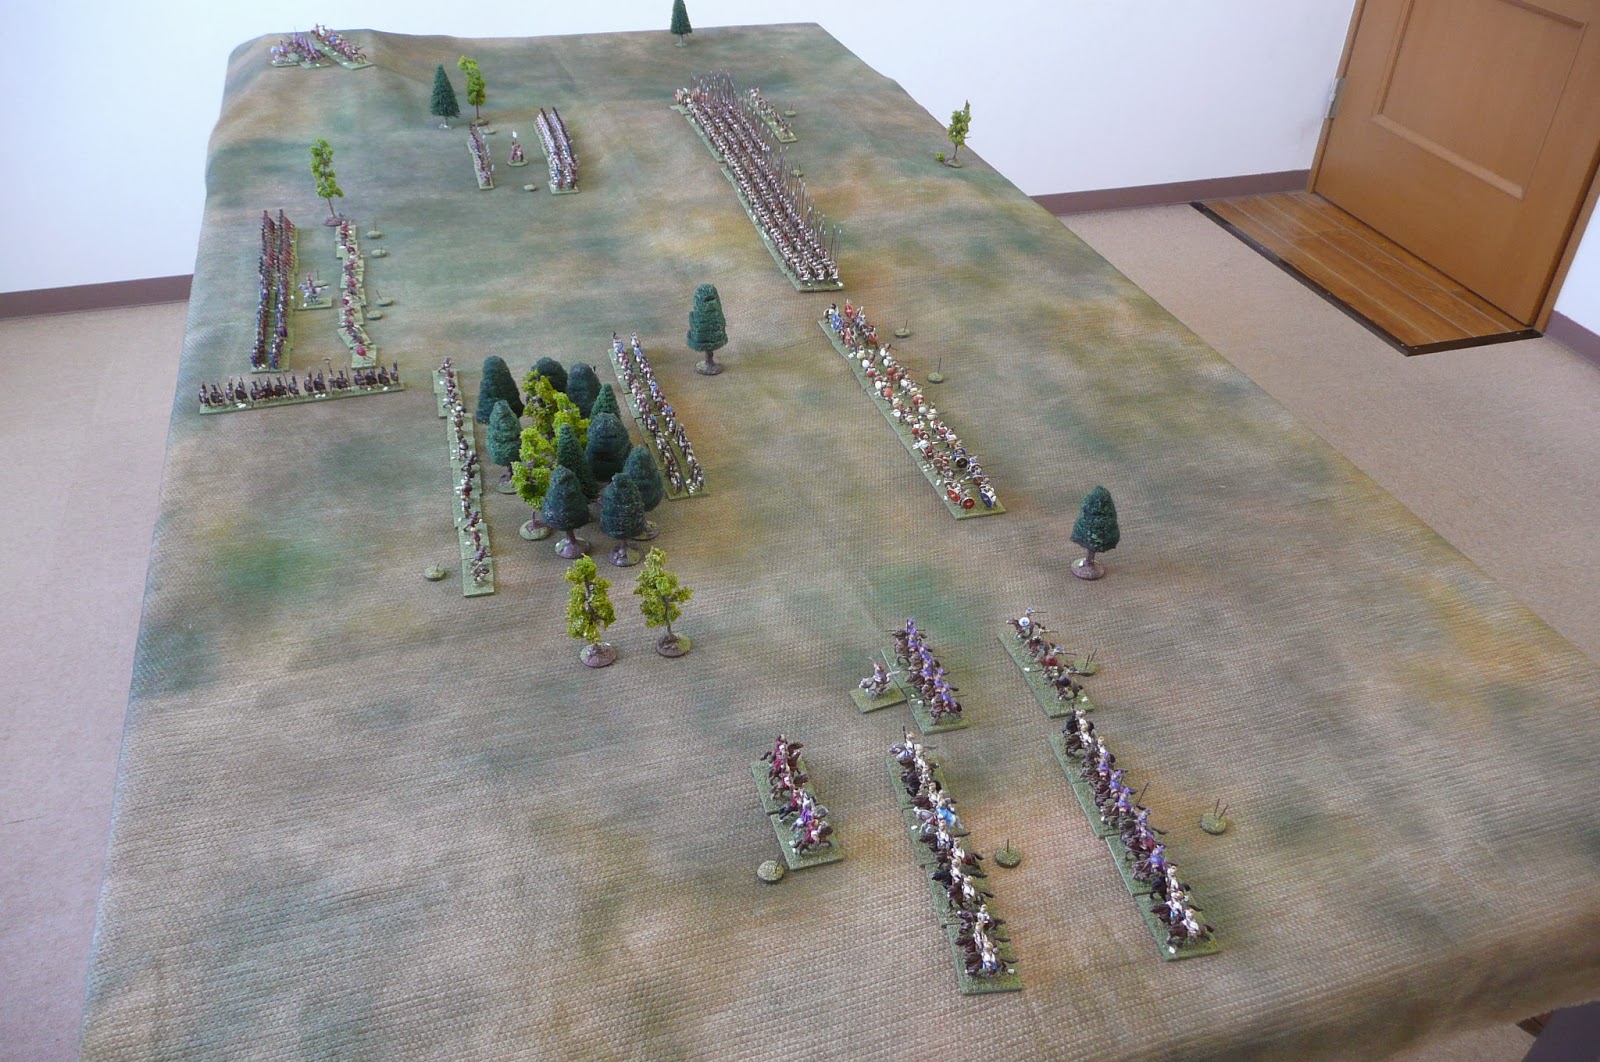
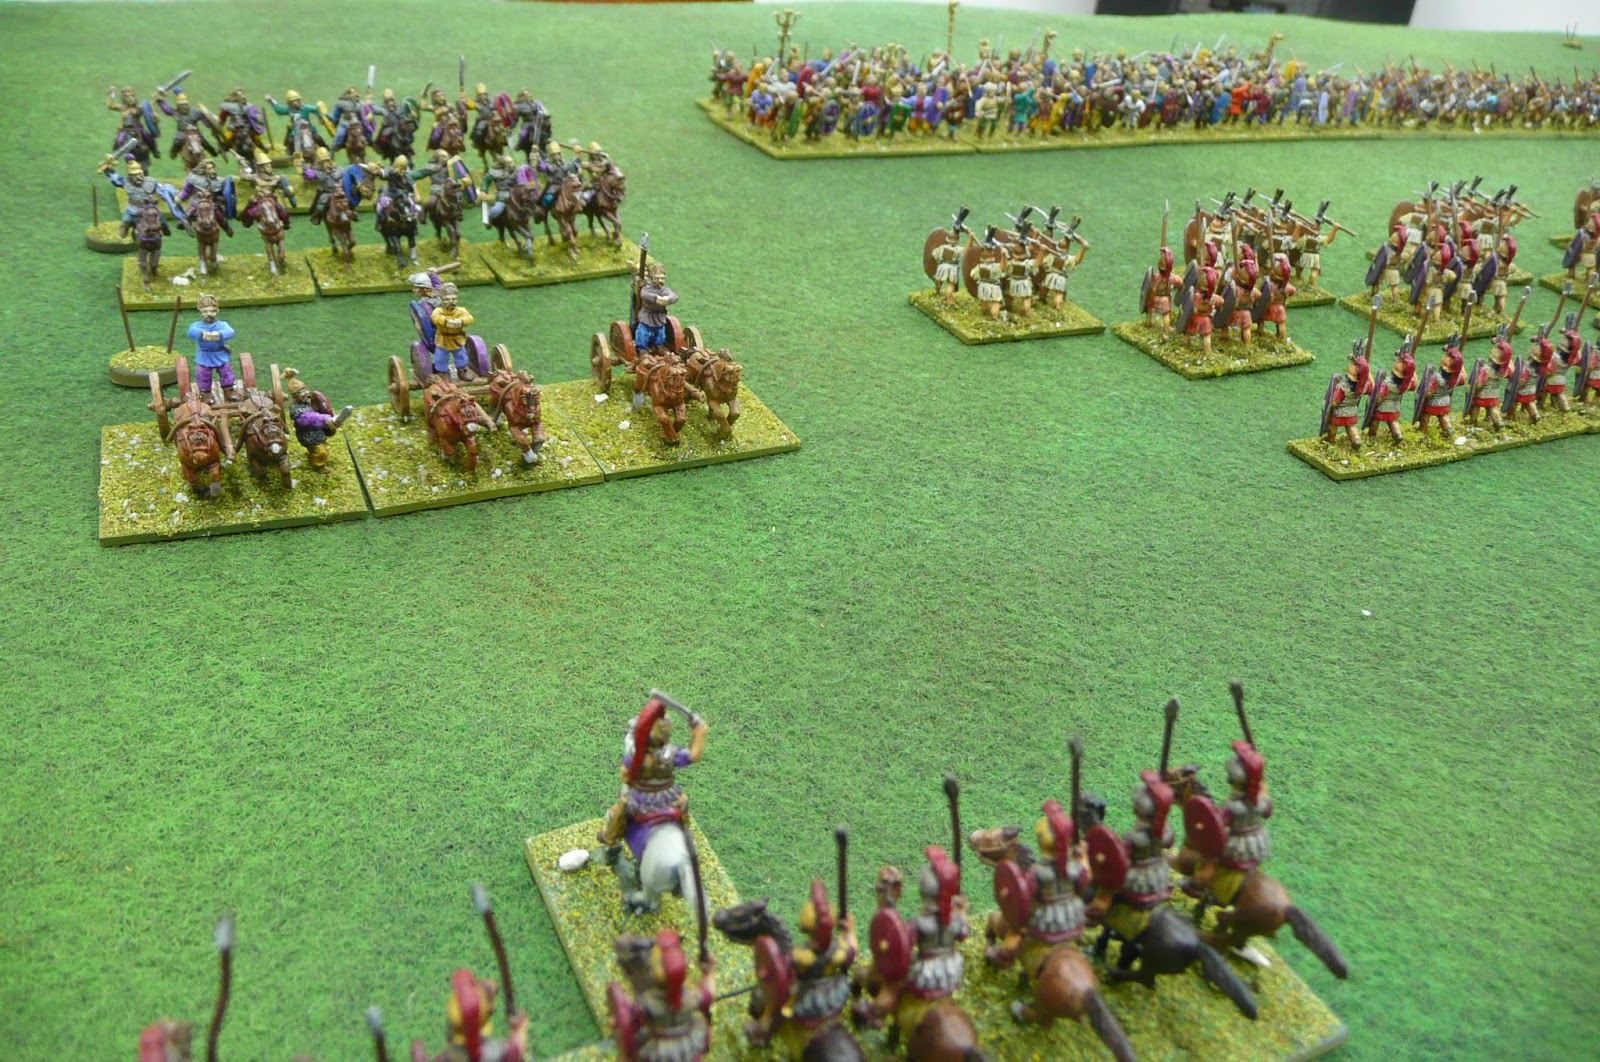
The Romans deploy with the infantry in the middle three zones, pushing forward the velites in the centre and through the wood.  The cavalry is divided into a weak left and a strong right.

Alexander deploys his phalangites on the hill with the peltasts and thureophoroi in support. Nearchus leads the bulk of the cavalry against the Roman right while Alexander himself goes to the right with a view to taking the heights on the Roman left and turning the flank.
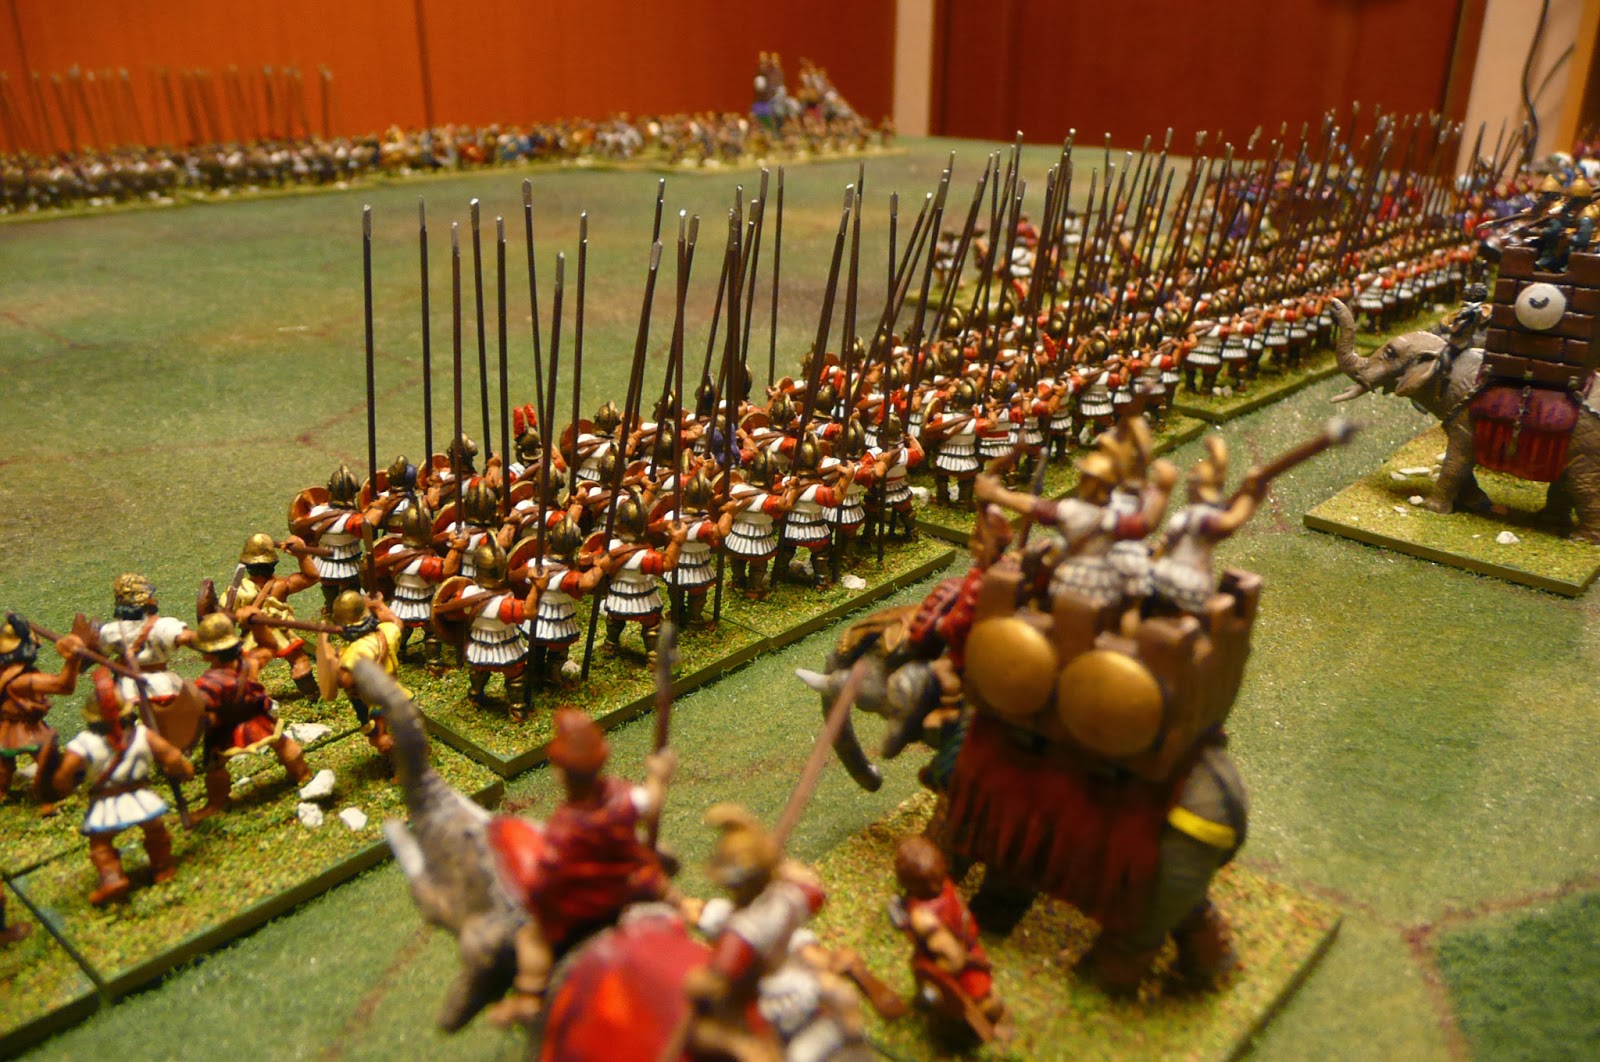
Romans on left and Greeks on the right.

Turn 2.

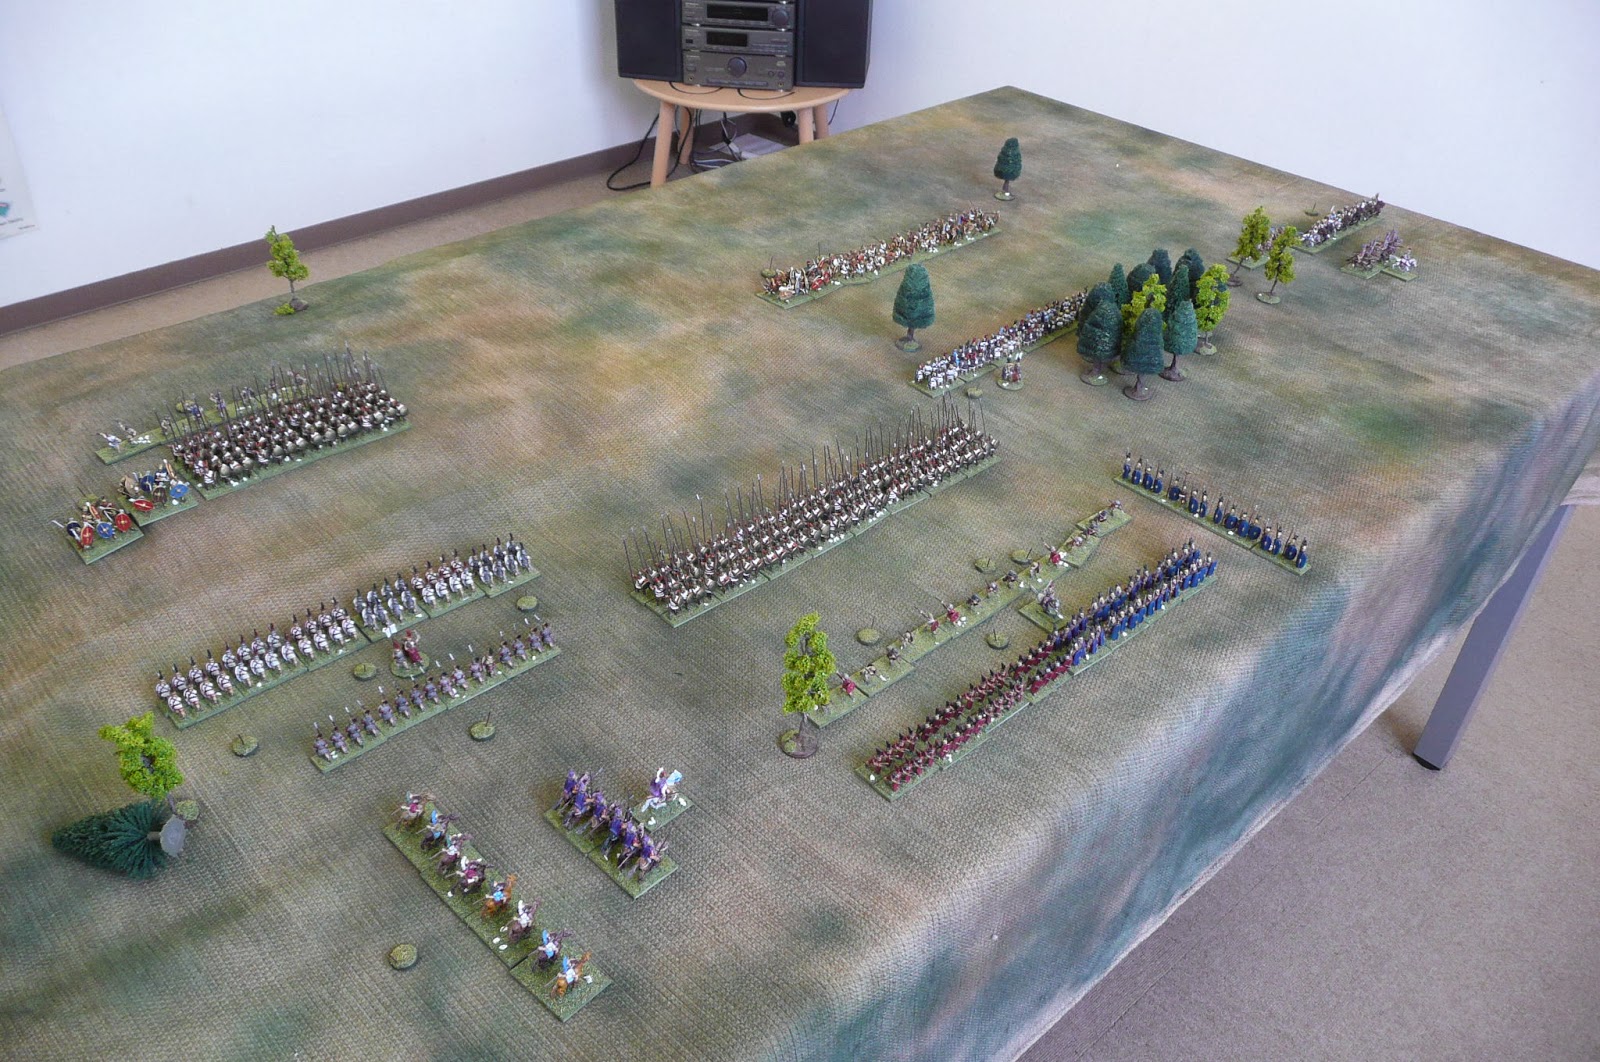
The Romans push forward all along the line and dress the cavalry for contact.
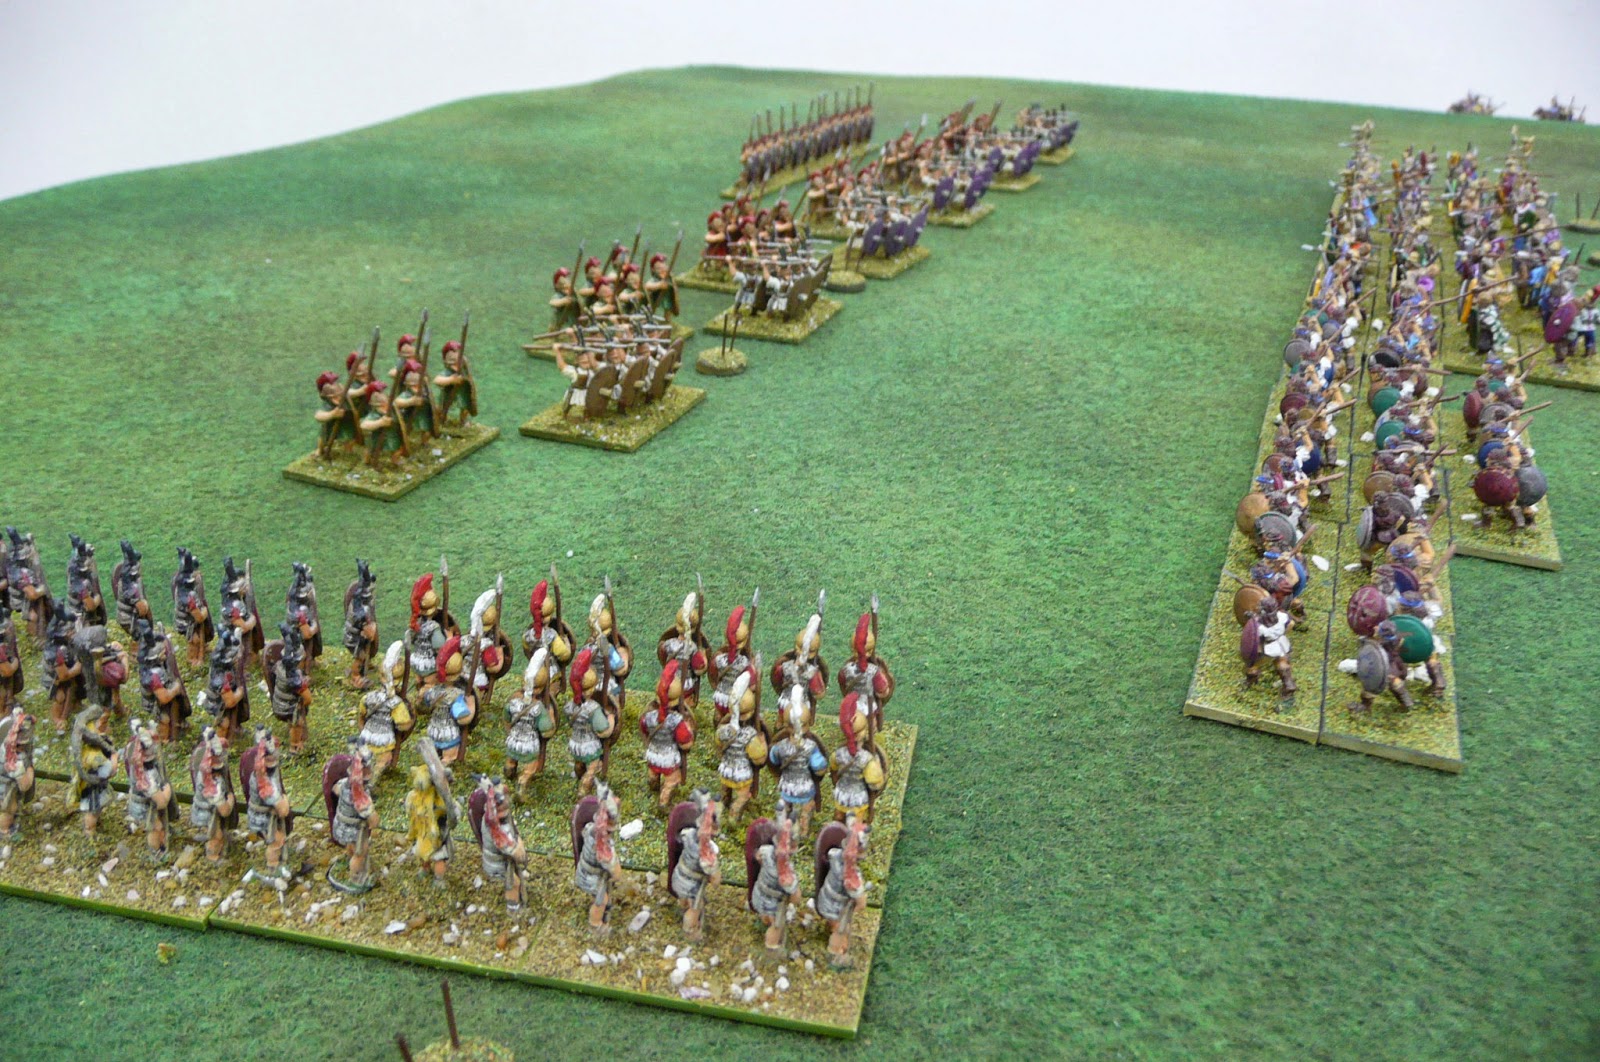
Roman advance.
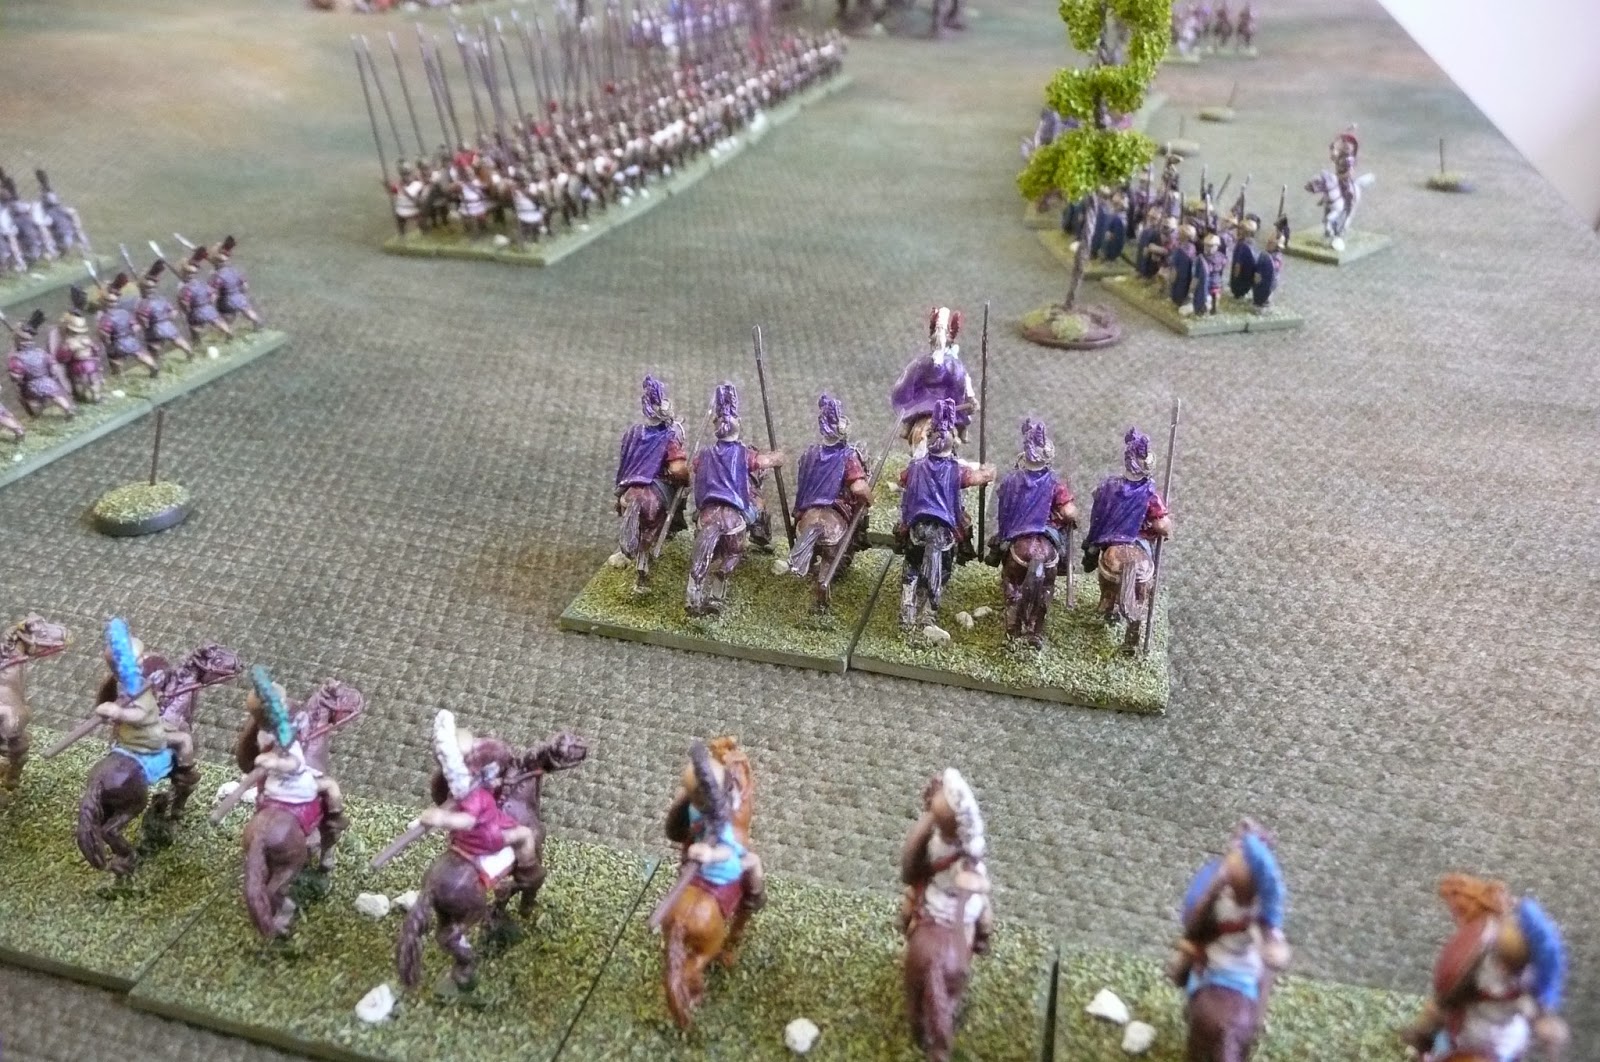
Alexander moves forward aggressively on the right, while the slingers cause some damage (1 hit) to the unscreened legionaries who are approaching the Greek infantry. The Greek foot advance to the edge of the hill and Nearchus readies his command to receive a charge or, if one is not forthcoming, to initiate one himself.
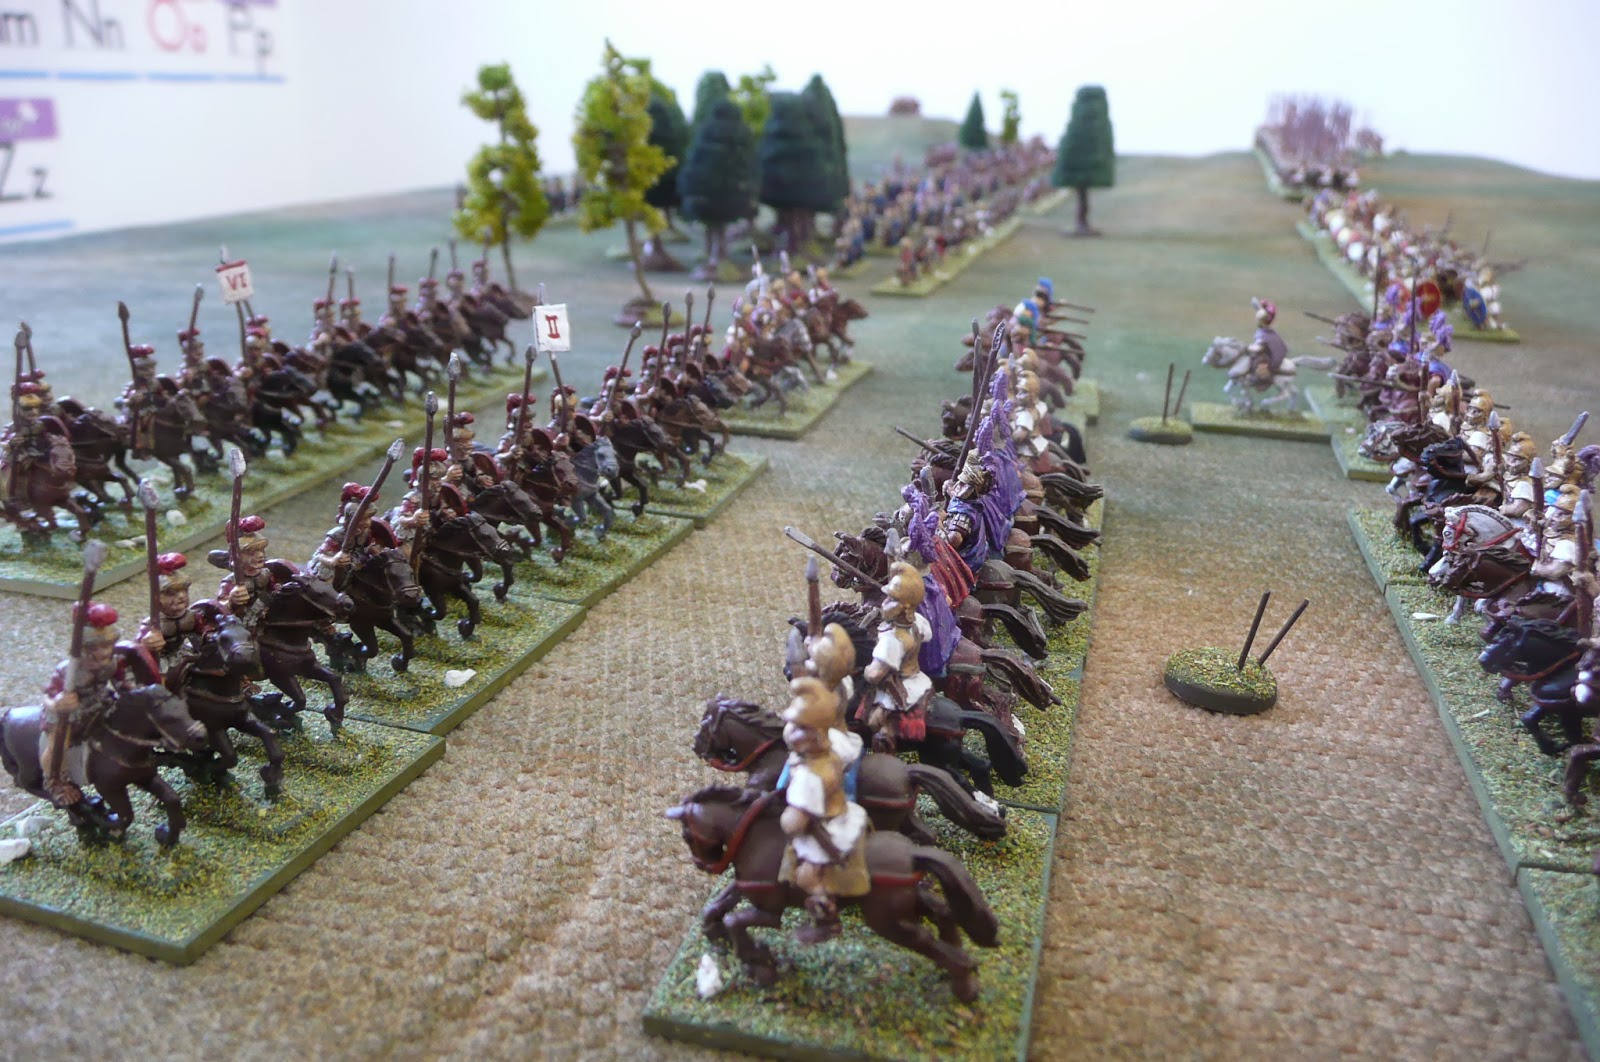
Greek cavalry advances.
Turn 3.

The Romans attack all along the line.  They drive off the slingers (1 hit), disorder the Tarantines (1 hit) and sow confusion amongst the peltasts holding the left of the Greek line (2 hits).  On the right an unnamed tribune leads an effective charge against Nearchus who pays for his caution by seeing his Tarentine light horse and the mixed Greek cavalry unable to withstand the Roman attack (2 hits).  Only tiredness prevents the Romans from following up their advantage further (they just miss scoring another hit due to the negative modifier for charging from a distance).

Roman success in the charge.

The cavalry battle it out.


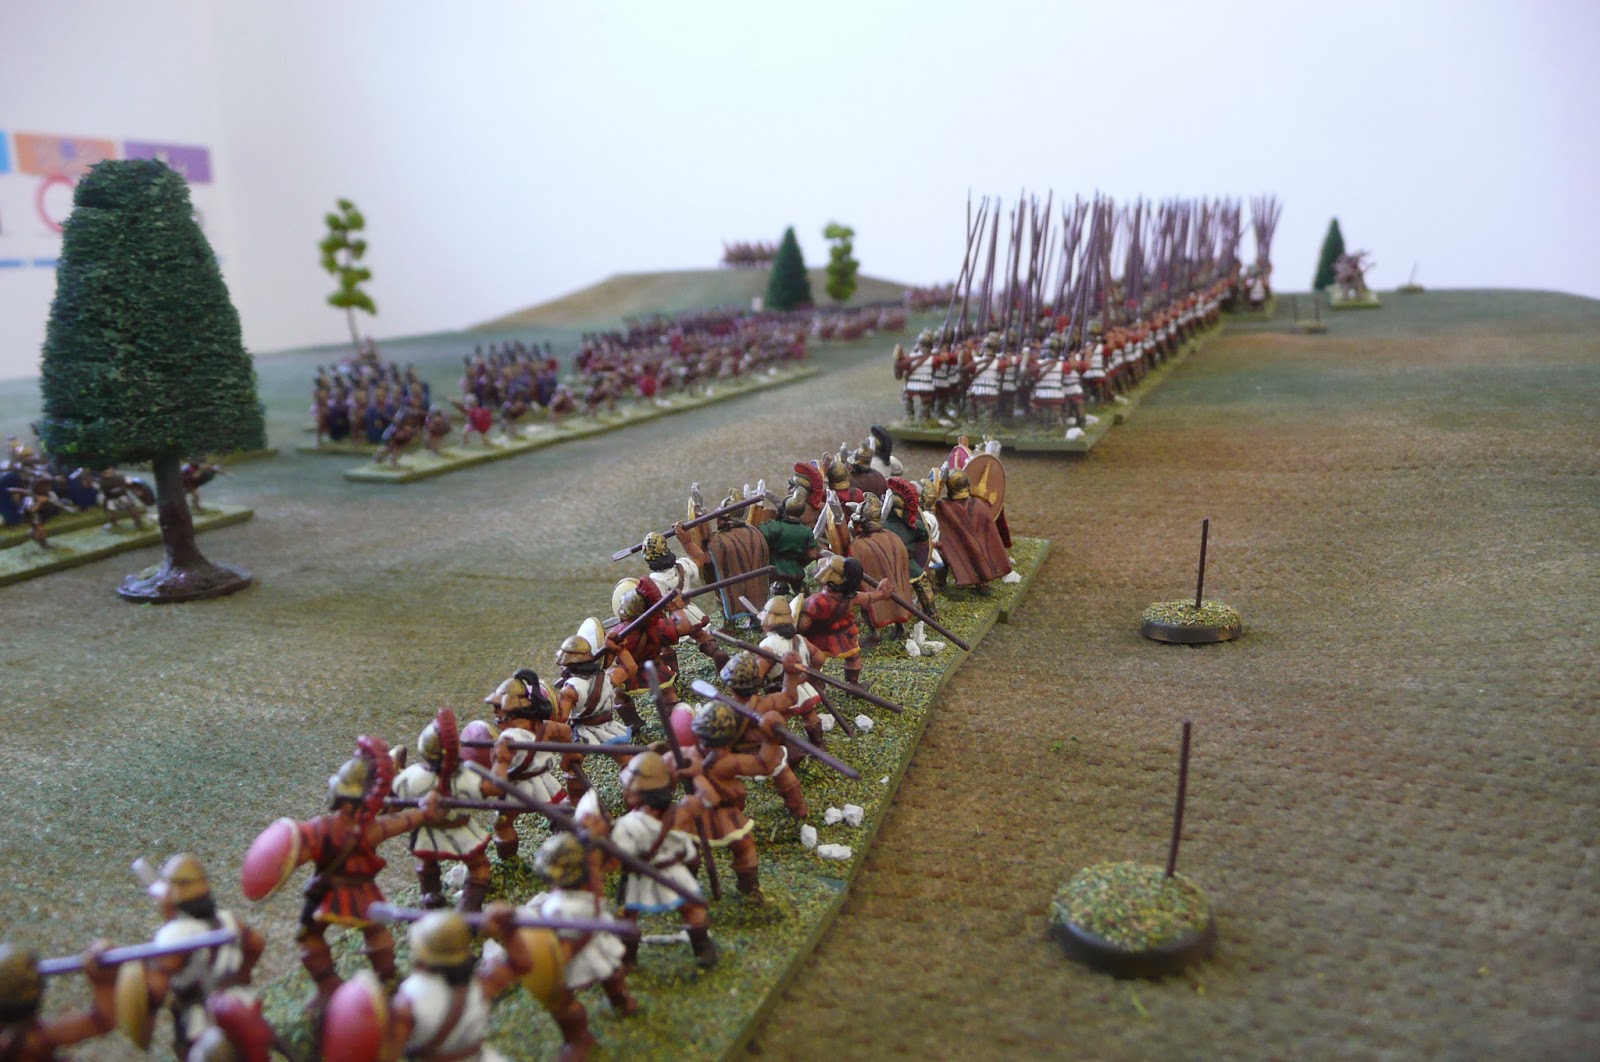
The peltasts are met with missiles from the woods.
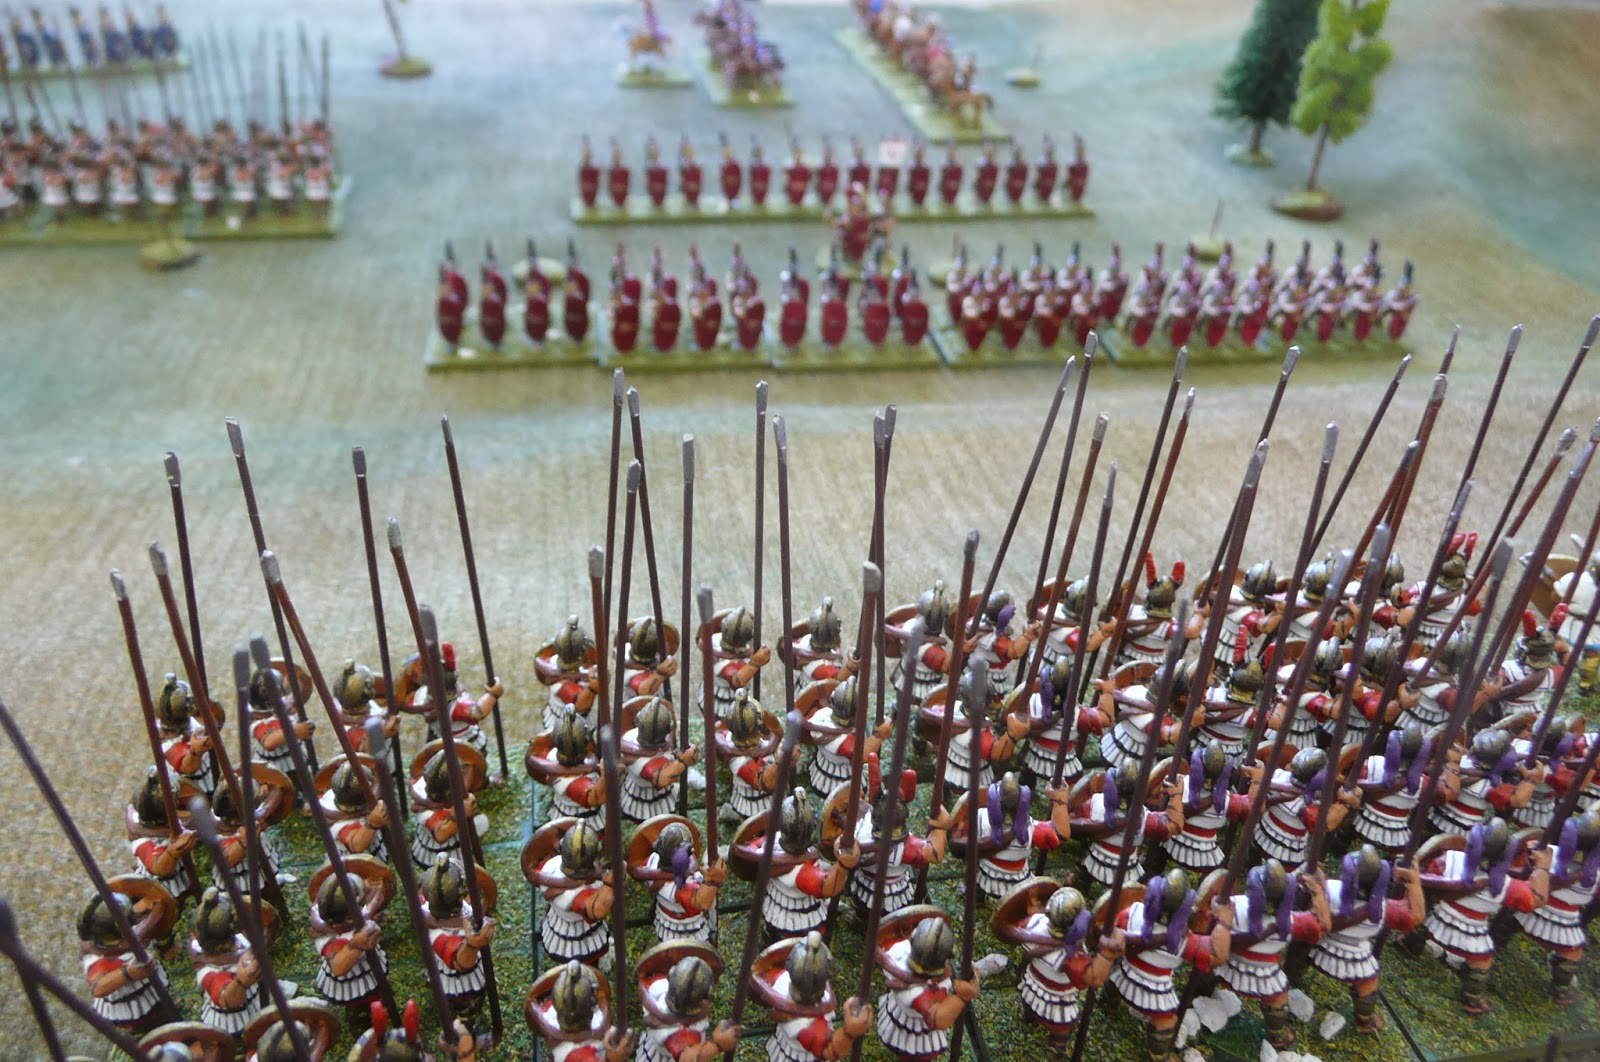
The phalanx must be driven off this hill!

Nearchus and Alexander lead the Greek ripostes as the cavalry fights continue to build in intensity. The uphill assault is treacherous, but the equites holding the hill have been shaken (1 hit).  On the other end of the line Nearchus's second line of horse cut into the Roman line and fight them to a standstill (2 hits).

In the centre the phalanx is proving to be an intimating opponent as the velites and the hastati wrestle its moral and physical weight (2 hits in the centre).  On the left of the infantry line the experienced Thracians hold the line against the advancing Romans and the velites fall back under a volley of spears (1 hit).

The cavalry fight continues.

Turn 4.

The cavalry on the hill hits back at the Tarentines with Alexander, driving them back down the slope (1 hit).  The legionaries of the left make a concerted effort against the far end of the Greek line, and as they work their way into the gaps opened up by their pila and the uneven ground the troops supporting the Macedonians begin to give way (2 hits).

Elsewhere the combats have devolved into exchanges as the troops conserve their energy, but not so in the cavalry attack, where the Romans drive in again on Nearchus and his men. They hold, but barely (1 hit).
Lines engaged.


Alexander now commits himself and his guard to the attack and they carry the hill, breaking through on the right (1 hit - a shatter).


Breakthrough on the right!
The centre, seeing the success of the king, pushes against the Roman line, with dramatic results. The fresh phalangites in depth push back the Romans like rag dolls, and their line - so determined just moments before - is now on the brink of collapse (3 hits, now all the Romans in the central zone are spent).

Nearchus urges his Macedonian guard cavalrymen to remember their fame in war, and they return to the combat with renewed vigour.  This time all but the veteran Italian cavalry break in the face of the Greek spears (3 hits - 2 shatters).

Everywhere now the battle favours Alexander.  What can Clepsina do to turn the tide?

The Romans are falling apart under the pressure.

Turn 5.

The veteran cavalry on the right fall upon the flank of one overly-enthusiastic unit of pursuers, shattering them and driving them from the field (1 hit - 1 shatter), but there are three more units to deal with and the odds against the Italians are long.

Clepsina decides to pull back his demoralised centre and force the phalanx to come down off its hill to continue the fight.  He cannot retreat them all, so the rest of his men hold in place to cover the withdrawal.

Clepsina pulls back

Nearchus and his men now overcome the last of the Italian cavalry and rush on to outflank the Roman right.

Nearchus attacks.

Alexander comes around behind the Roman left and threaten Clepsina's centre.  The central phalanx follows up the retreating Romans while the rest of the line attacks.  The Macedonians left on the hill now turn the tables on their Roman tormenters with a furious attack that leaves the legionaries confused, disorganised and demoralised (2 hits, 1 of them an all-out-attack, all units in the zone are now spent).

The thureophoroi press similarly hard and the Romans are only just holding on (1 hit).

The Roman line fragmented and under pressure.
Turn 6.

The consul organises his men to face the enemy as best he can.  The triarii from the right join him to stiffen the resistance.  Elsewhere the pockets of Roman troops flail against the enemy with no success.

Clepsina tries to reorganise the line.


Alexander leads the attack against the milling infantry and Clepsina rides to meet him. After a brief and bloody clash Clepsina falls (1 hit, Clepsina dies in a rally attempt - 1 shatter, 4 rout) and the end is nigh for the Romans.

Alexander leads the charge and the last Roman resistance begins to crumble.

Elsewhere the Macedonians attack down the hill (1 hit, all out attack) and this is enough to cause panic and the Roman flight now becomes general.

Last rites.

Roman remnants.

The day is lost!


Alexander has won an astounding victory, and all Italy will tremble at the news!

VPs.

Rome: 1 shattered (6vps), 8 average spent (24vps), 1 veteran spent (4vps), 2 levy spent (4vps).

Epirus: 5 average shattered (30), 1 veteran shattered (8), 1 average commander killed (12), 7 average routed (28), 3 average withdrawn (9), 2 levy routed (6) + 3 points on handicap.

38 vs 96 is a great victory for Alexander.

This was a thoroughly enjoyable game and it was interesting to see Rome really struggle against the phalanx.  The lack of command points to spend on combat bonuses and the ability of the phalangites to use their depth to advantage (+1) saw a very one-sided combat in the centre, and that is what ensured that Rome would lose.


Rise of Rome Solitaire Campaign

$
0
0
I'm working on a few ideas for a solo campaign on the Rise of Rome from 300BC through 200BC, ie, from Sentinum to Zama.

The plan is to use very simple rules and perhaps a small set of event cards to spice things up.  It can be used to provide a context for tabletop battles or to race against time and try to better the historical rate of expansion.

If it looks promising I might do the rules up properly and send them in to Slingshot, but we'll have to see how we go on that...

Map adapted from this one here


Rise of Rome Campaign play test

$
0
0
I got though a play test of the campaign game last night to assess where it was at.  I used a simple dice roll to resolve the battles, with the odds being either even stevens or +1 to one side of the other, depending on the historical situation.

This is the map used, though in play it became clear that it needs a few tweaks...

Map adapted from this one here.

Each turn is made up of three phases, which may be either a Roman or an enemy action, depending on a dice roll.  On an enemy action, the general result is that the dominant enemy faction attacks Roman or Roman contested territory.  Depending on the turn and the enemy, one side or the other may have an advantage in the battle.

On a Roman action, the Roman player can make an attack against enemy territory, build up fleet points (necessary for attacks across water), or attempt to pacify a contested territory.  Again, this will likely result in a battle, with the odds determined by the situation and the time.

When Carthage becomes active, the dominant enemy starts to play with a little more intelligence, using its actions to attack Sicily or Iberia instead of battering itself against Rome solely.

Changes to the map -

  • Add a sea route between Rome and the Ebro region in Iberia.  
  • Add a land route between Cisalpine Gaul and Samnium 
  • Include fleet points needed for sea movement on each route.  
  • Include a combat advantage marker to show which side (if either) has combat advantage at the present time.

Changes to the rules -

  • Build in incentives for Carthage to conquer Sicily and Iberia, perhaps in the form of stored +1 attacks to represent Hannibal's campaigns.    
  • Work out a better scheme for 'pacification' of contested territories.
  • Build in better rules for Sicily.

Changes to the info -

  • Better clarification of who holds battle advantage.
  • Create a table to show possible divergences from the historically dominant enemy

As you can see, there is still plenty to work on!  

Regarding the game, Rome got belted early on and was unable to make much headway in Samnium and Magna Graecia against determined defence.  By the time of the First Punic War, Carthage was able to take Sicily without Roman interference (despite bad dice rolls meaning it took a long time to do so) and then consolidate in Iberia.

Rome finally completed the conquest of Southern Italy just before Hannibal appeared, and at game end, thanks to his rampage, Carthage controlled most of the board, with only Rome and Magna Graecia red, and just the Ebro region contested.  


Shots of Sentinum

$
0
0
I was looking through the camera today and found some shots from a solo game of Sentinum I played in January.  It's a slow news day, so why not post some?

Game was, naturally, Lost Battles.

15mm Minifigs here, with command stands from Magister Militum.

Mix of Lancashire, Magister Militum, Old Glory, Tin Soldier and Xyston for the Samnite and Gallic foot

Miniatures Wars (from Strategia Nova) Romans, Miniatures Wars and Old Glory Samnites.

Old Glory Chariots, Xyston Gallic horse, Magister Militum Romans. 

I think we can see who won this!

Some notes on the whiteboard...

Online interaction best practice

$
0
0
There's a song by a band named Lynyrd Skynyrd called 'Simple Man' in which the Southern rockers relate some advice their mother(s) gave them.  "Don't live too fast"; "Don't forget there's someone up above"; "Be a simple kind of man"; "Forget your lust for the rich man's gold", etc.

It occurs to me that wargame-centric bloggers need their own version of this, but rather than present it in musical form, I've decided to be equally imperative but more prosaic, as this is in keeping with our style.

So here we go.  You can hum it if you prefer.

1) Always comment on the posts of popular and respected wargaming bloggers.  Be aggressive.  For example: "You may think the article you've just posted demonstrates a good way to make nice cheap trees for 6mm ACW games, but I have a far better method."

This implies that you must be someone who has a lot to offer the community.

2) Be friendly.  Post links to your blogposts everywhere you can.  If the posts you link to have nothing to do with the topic at hand then so much the better: people need to expand their horizons at times.  Crossposting at TMP is a good idea, as is flooding your friends' facebook pages.

3) Don't be positive just for the sake of it.  When you are reviewing figures, complain about the service you got from the retailer, the poor quality of the castings and the lack of variety in the poses.  You never know if the retailers/manufacturers you dealt with ever see your post they may say to themselves "Gosh, I must send this dashing young opinion-shaper free stuff to placate him."

4) Be helpful.  If someone somewhere is asking a question, always answer it.  If you don't know the answer, use an especially authoritative tone.  For example, "Take it from me, you CAN use the Essex 25mm late Roman range to expand your Warhammer Empire army."

4) Don't be afraid to repeat yourself.

5) Be gentle with newcomers.  Don't rip them to shreds for disagreeing with you or for not knowing something that you already know. Just point out to them firmly but forcefully that they are wrong, and that since they clearly don't have much of a clue maybe they should shut up.

Or if you are really independently-minded you could just listen to the song and come up with your own adaption.


Games in the classroom

$
0
0
It's coming up to the end of the school year here in Japan and a few of our long-term kids students are leaving.  They tell us it's because they can no longer fit English classes into their increasingly busy schedules, but maybe it's just that I stink as a teacher!

Whatever the reason, the incontrovertible fact is that some of them are going, so as a wee last-class treat I brought out my copy of DungeonQuest today and spent the last ten minutes of each lesson letting them play.

They would all simultaneously draw a tile and move, and if a tile looked a touch dangerous I would 'oooh' and 'aaaah' a bit and get the student affected to roll a die. If they rolled lowish I would bring out a creature (World of Warcraft board game: I've never played you, but your figures make good monsters!) for them to fight, and they'd have to beat its score on opposed dice before they could continue moving.

If they came to a locked door they would need to roll to get through it; a trap and they'd need to roll to jump over it; a spider web roll to escape it, etc.

To continue the illusion of it being an English lesson I had them each make sentences describing their action each turn:  "I go here!"; "I fight the monster!"; "I jump the infernal pit!"; "I swing my trusty blade and disembowel the goblin chief, spilling his entrails all over my textbook!", etc.

When they got to the treasure trove in the centre of the dungeon they had to fight the boss monster, a large green Balrog lookalike (thank you again, World of Warcraft!).  After the monster was slain (and of course it always was), they would roll dice to collect treasure, and whoever got the most gold would be hailed most triumphant.

They loved it, and it reminded me again how much fun games can be, especially when you make up the rules as you go along.  And you know what, it works: they chatter away using English, hardly even realising they are doing it, and end the lesson wanting more.

Sometimes - only sometimes, mind! - teaching can seem like the best job in the world.

Rules Archive

$
0
0
Following Trebian's post from last Friday, and Dave Knight's as well, I thought I would do a similar compilation list of owned rules.

The trick is that they must be a hard copy and purchased by me, but I'm also going to include gifts.

I actually thought I had more rules than this, but I suppose that's because I buy too many boardgames as well!

Ancient and Medieval Wargaming - Neil Thomas rules. Simple set with lots of army lists. Open to interpretation so house rules need to be sorted out. Makes for a fun game. Jumbos are overpowered, but that's good if you're playing with your kids because you just give them the elephant army!

Ancient Warfare - A gift from a friend. Uses exotic basing, so probably won't play these.

Armati and Advanced Armati - Ancients rules from Arty Conliffe. Have no local opponent so have only played once and then solo. Would like to try them some more.

Broadsword - Ebay buy. Diceless medieval miniatures.

Classical Hack - Ancients rules from Phil Viverito. First set of rules I bought, but there are some things about them I didn't much like, so eventually moved on.

Command Decision 2nd Edition - WWII set from GDW. Not yet played.

Commands and Colors: Ancients - Very popular game from Richard Borg that uses hexes to regulate movement and cards to activate units. Produced as a board game but designed with miniatures in mind.

Corvus - Ancient naval miniatures rules from the Society of Ancients. Not played yet.

Crossfire - Remarkable set of WW2 rules. I'm not yet experienced enough to rate them properly from play, but I love the ideas behind them.

DBA - The classic 12-element set. I don't mind it the big battle version, but doesn't really appeal to me enough to learn all the ins and outs of the rules.

DBM - Wanted to like these, but the gaminess of some of the tactics put me off a bit.  Might get back into it for some solo games at some stage.  The army lists are a fantastic resource.

Field of Glory - Played one game but didn't really grab us and haven't played again since.

Hail Caesar - Development of Warmaster Ancients. Rules that seem to suit a casual club scene with big battles involving beer and lots of players. Not very appealing to me for solo play for some reason, even though they should work OK.

Johnny Reb II - Classic American Civil War rules. Order chits, strict sequence of play, really enjoyable. Sad to say I've still only had one game.

Kampfgruppe Commander II - WW2 rules. Not yet played, but there are things about them I like.

Legion - Early set from Phil Sabin.  Detailed look at ancient warfare. I need to get an appropriate hex mat sorted out to give these a try.

Might of Arms - A recent purchase. Keen to look at these a bit more.

Modern Spearhead - Modern adaption of the Spearhead rules. Gripping games at the outset, but they can become a bit of a grind as you end up rolling, rolling, rolling and rolling again for rockets, artillery, mortars and air strikes. Games are often decided by who can get their flank march to arrive at the right moment. My opponent generally outplays me tactically and yet we end up at around 50/50 in results, which goes to show that luck and playing the Americans is important!

Napoleon's Battles - Classic Napoleonics set. Probably too long in the tooth to make the time investment needed to learn these now. If I'd got them when I was a teenager I'd have been all over them.

Shako - More Arty Conliffe rules.This time Napoleonic.

Shattered Lances - Interesting Crusades set. Not sure why we haven't played these yet. Have been meaning to for years!

Shipwreck - Modern naval. Looking forward to trying these out.

Spearhead - Good rules for WW2 with 1/300 scale miniatures. Less arty-reliant than the Modern version, but I've only played twice, so it may depend on the scenario.

Strategos II / Lost Battles - Innovative rules from Phil Sabin. Best ancients rules I've played. Makes for great stories and historical outcomes.  Hard to beat.

Warhammer Ancients Battles - Well known GW set for 28mm figures. Not really suited for 15mm figures, but you can play it.

Warhammer English Civil War - A gift from a friend. Familiar Warhammer mechanics.

Warhammer Fantasy Battle, battle for Skull Pass set - 3rd edition was my introduction to miniatures gaming, and bought this out of nostalgia. Not the same game however, and not yet played in this form.

Warmaster Ancients - Designed for 10mm figures. Idiosyncratic basing for pike and shock cavalry, but an interesting set of rules. Played one game solo.


Quiet on the Eastern Front

$
0
0
There has not been much activity here of late.  I was away on a ten day jaunt to attend my brother's wedding and catch up with some friends in various places and I haven't exactly hit the ground running since I've been back.

While I was away I was lucky enough to be able to strap on a guitar and get up with some musicians again and a significant part of me is pining for the jam room rather more than for the gaming table.  Add to this some concerns about future career direction and wargaming is suddenly not seeming to be quite as essential as it was three weeks ago.

Here's no great matter indeed...

Ensuring there is balance will be the key!

ANZAC Day Brothers in Arms

$
0
0
Today is ANZAC Day in Australia and New Zealand and for many Aussies and Kiwis it's a bittersweet time.

This then is just a wee song in honour of those who served and those who waited (and perhaps still wait) for them to come back. Apologies to Mark Knopfler and Dire Straits.


Quick (and extremely derivative) Ancients rules

$
0
0
As I try to work myself back into gaming mode again I've been going back to an idea I had a couple of months ago for a kid-friendly, language independent miniatures game.

The plan was to base the rules on Commands & Colors and to have the table layout give the players most of the information they need to be able to play.

Infantry units would be represented by four bases and have four strength points, cavalry would be represented by three bases and have three strength points, elephants and war engines by two bases and have two strength points.

Four-figure bases would roll four attack die, two-figure bases two attack die, and so on. Missile fire would be restricted to troops armed with javelins, slings or bows, with one attack die lost if units moved before shooting.  For each strength point lost, units would have to roll a die pre-combat.  If a one was rolled they would lose one attack die.

Non-missile units would hit on fives or sixes and missile units would hit on sixes, whether using close or distance combat.  Leaders would either add an extra die or allow hits on fours.  Ones could, in some cases, cause a retreat.

Movement would be regulated by a hex grid such as a I normally use for true C&C games.

Activation would be by d4 roll, with one pip allowing a single unit to activate and two pips allowing a line of connected units to do so.

Players would be represented on table by leader figures and might be able to fight hand to hand against enemy leaders if they wanted to, a la Warhammer Fantasy Battle.

To win the game you'd need to kill a certain number of enemy units.

If used with my students I might allow a few extra rules: if they were able to remember to use certain sentences, for example, they might be able to roll an extra attack die, or move one hex farther than usual.

The main thing though is to have something fun and accessible for the cousins / kids' friends to play when they come to visit.


Simple Zama

$
0
0
I had the chance to have a couple of friends come over for a game the other night and in line with recent musings about accessible rules I decided to try out a 'derivative ancients' scenario.

Units and combat were based on Commands and Colors: Ancients, but without the heavy/medium/light distinctions.

Four figures per base meant four attack dice, three figures three attack dice and so on.  All movement was by hex, as per CCA, and shooting was as javelin-armed shooting in CCA.  Unit casualties were removed in bases so it would be easy to see how strong/weak the units were.

Most of my CCA boardgame gear is back in New Zealand, so we used normal dice for fighting and although I have some cards here we used die-roll activation rather than activation by card play.

Activation pips were d4+1.  It cost one pip to activate a single unit, two pips to activate a line fighting or all moving at the speed of the slowest unit and three pips to activate a line moving or fighting at their own speeds.  Leaders gave a one pip discount to line moves, but lines could not extend across left/centre/right boundaries and nor could they exceed five units.

The activation rules were simple but they gave plenty of scope for players to do what they wanted to do while also giving them some tough decisions to make.  It also avoided adding the extra layer of complexity that using a card system for activation would have entailed.

The scenario was going to be important. I went for a famous battle that had both sides fairly evenly matched and that did not have much in the way of terrain to worry about.  Given the armies I have painted at the moment, Zama was the obvious choice.

I would umpire to give rules advice and help keep things going if the guys got bogged down with options.

To win the game would require nine victory points, with VPs to be scored by destroying enemy units.

The first picture (below) shows the game after the opening move, in which M (as Rome) advanced his light infantry to pepper the elephants and the left wing to threaten the Carthaginian right.


B (as Carthage) responded by shielding the elephants with his own lights and advancing cavalry on both flanks.


Rome took a points victory in the tentative tussles on her right but Carthage got a clear advantage on the other flank (seen below) by virtue of some bold cavalry attacks.


B opened up a 6-1 advantage in unit kills over the Romans and it seemed that Hannibal might have an easy win.

But things were not quite as one-sided as it would appear from the score alone: the Carthaginians had six units reduced to just one remaining base, so if the Romans could get in close enough they would be able to even things up reasonably quickly.


But this was the time when Rome went through a low-pip period, and her attempts to polish off enemy units with missile fire from the Numidians did not go to plan.  Still, the Roman advance got underway in the centre, which caused B to worry for his elephants again.


As M's missile volleys drew closer, B advanced troops out of the line in an attempt to drive off the offending velites. In the confusion the Romans began to score some successes against those already reduced Carthaginian units, bringing the victory count to a more respectable 6-4, and opening up the possibility of picking off some more (if only the javelin men would shoot straight!).


With the pressure building in the centre B sent forward a unit of elephants to hit the Roman heavy infantry, but he could not quite finish them off.


In the counter-attack the elephants were destroyed and two other units with them.  It was now 7-6 to Rome as her remarkable comeback gained pace.


Carthage committed a second elephant which attacked a unit of hastati and while it died in the attempt it took a Roman commander with it.  Still needing one more kill to win the game, M could not quite manage it this turn as he failed to kill off the auxiliaries.  With the score 8-7 to Rome, B and his Carthaginians took up the pip die once more.


With two unit kills needed to claim the victory for Carthage, B threw in everything he could - elephants, Spanish auxiliaries and Gallic warriors.  If they did not win they would be killed in battle back, giving Rome the victory. It was to be knife-edge stuff...


And knife-edged it proved to be: with his last two throws of the dice B managed to kill off the stragglers and claim the last victory points he needed to leapfrog his great mate M and win 9-8.

It was an exhilarating game that had a bit of everything and I was very pleased with how it all went. I think it vindicated the simple rules approach and the 'give-the-players-the-options' command rules.

Both players had a great time and are very keen to play again at some stage, so a good result all round!
Viewing all 493 articles
Browse latest View live